Thursday, 5 August 2010

More progress on Calshot II


The construction of Calshot - Weathering, modelling quay walls and general progress
 
Well, work is ongoing on Calshot II. I have experimented with weathering as it is something I have always wanted to try but never really been confident with trying out. The first image shows my two weathered wagons (I'm yet to work out how to weather the roof). First the wagons were given a wash of a browny colour and then mostly dabbed off with a cotton bud. The raised metal detail is then painted with a red/orange rust colour, paying attention to get paint into the corners. I am unsure if it looks good enough so I'd appreciate constructive comments - I can post more photos if required.

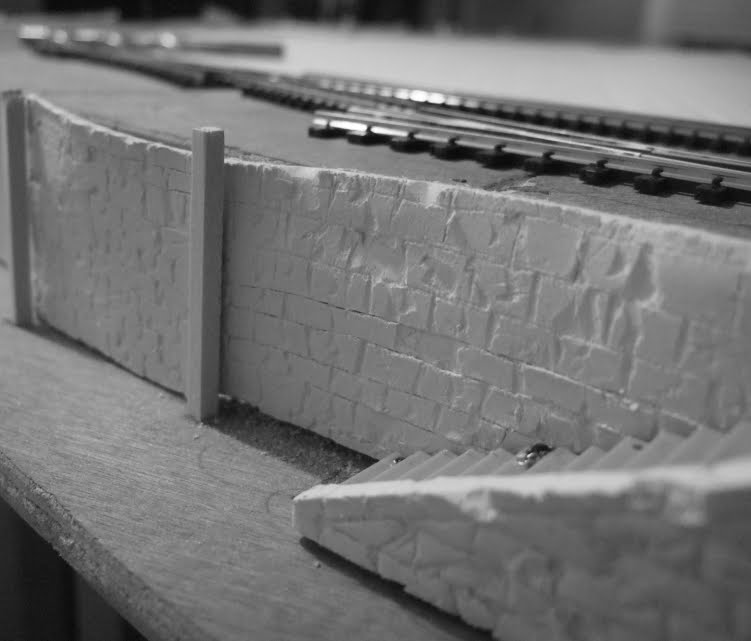
In other news, I have 'planted' some balsa quay piles (awaiting painting) and started some infilling using 'Fab Foam' which is just the right height for 00 track. The 00 track has been glued down as has some of the NG - the rest will have to wait till I get some insulated fishplates. 

Any comments, suggestions just write them down and I'll be happy to receive them.

Tuesday, 3 August 2010

Final plan and the sub-frame


Unfortunately carpenter Dad has been unwell recently so I've had to go it alone on the woodwork front. However, all is not lost as I'm not too bad at it myself (although not a patch on Dad!). Yesterday and this morning I started building the sub-frame. I have left it quite late but in actual fact this has been for the better. It is made from softwood reclaimed from an old layout.

To start with I marked out the longitudinal battens and worked out where I wanted the notches. The notches were then cut out using a saw and chisel which took about 3 hours to do 30 notches!


Next up was the initial trial fit of the battens just to check they all fit where they are supposed to!


Once I was happy, the battens were pushed into place. Quite a few of them needed a little encouragement with a saw and hammer but eventually all was well and they fitted in as shown below.


The next stage was to cut out the holes for the point motors. Some of these look far too small so I may have to remove some trackbed supports to enable them to be enlarged. They were cut out using a router.


Wednesday, 21 July 2010

The Quay

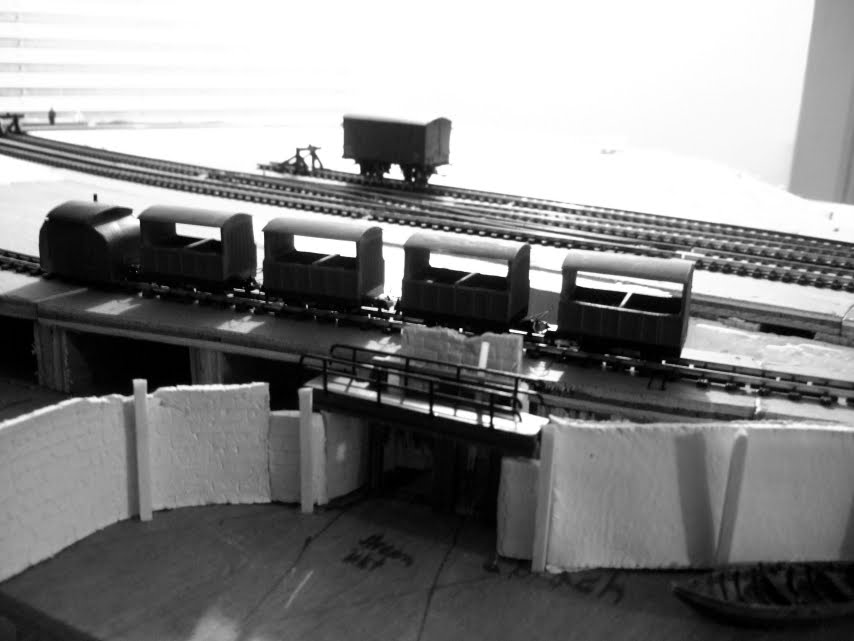
Another few hours worth of work sees the quay starting to take shape. All this is removable including the sea bed in readiness for wiring the layout. I will need to cut some access holes underneath the baseboard as the pins on the point motors are just that little bit too short to fit underneath the ply base. Hopefully all goes well and there is enough access to put the point motors in and the wiring.

I have also made a culvert (hard to see in these photos) behind the sluice gates. I admit to photoshopping the bottom of the walls to remove the unsightly gaps as none of it is glued down (again, for obvious reasons). However, I am really pleased with how it is looking so far. Scribing looks much better when the clay has dried whereas when soft the scribing is more rounded and not suited to ageing stone. The culvert and tunnel have also been scribed as well as the culvert wing walls.

Hope you enjoy this set of photos.


Tuesday, 20 July 2010

Modelling quay walls - A first 'proper' attempt

This is my first proper attempt and they look pretty decent if I may say so. The reason they are all at funny angles is because they have not been glued due to obvious reasons. These photos aren't very good, but they are adequate for now. I have tried to recreate worn looking stones with some stones missing and cracks appearing. I am pleased with the results so far, but I've still got another metre or so to build - this little lot has taken me 3 hours already! Despite what people say, I am not finding it too tedious - rather enjoying it. I expect that mindset will change with time. It certainly shows my creative aspect! Painting will come once I have learnt how to...


Sunday, 18 July 2010

Construction of Calshot - Part 4


Just a small update. The layout has been moved to MkI's legs with a drape around it to win Brownie points! That way I can have it tucked in the corner and can work on it where it is out of the way. Having it like this makes me wonder if I actually need a backscene. Then again, it is not going to be very photogenic without one.

A sluice and little footbridge have been built from left over scraps in the scrap box (funnily enough!). Still needs the mechanism and a spot of weathering. If it's one thing I think will improve my modelling exponentially it is being able to weather objects. I should really buy some appropriate paints and weathering powders and experiment.

I have also started building some quay walls using DAS modelling clay. They won't be glued in place until the trackwork and electrics is done to prevent damage. I will need to score them to represent stones and also paint them at some stage. The photos below should help visualise the progress.

A long way to go, but slowly getting there! Comments welcome.


Thursday, 15 July 2010

The construction of Calshot - Part Three - Basic relief

Construction is ongoing on Calshot MkII. Progress is a little slow due to lack of materials but I did manage to scrounge enough polystyrene to do the majority of the first layer of the basic relief. The polystyrene isn't quite thick enough to be up to the trackbed height so another layer will be needed.

In the photo below the Walrus seaplane is standing on the slipway (yet to be carved) and the inset image is one little cameo I hope to include which will be a sunken pillbox with exposed and eroded foundations with two residents - one lying on the grass and a fisherman nearby hoping to catch something from the Solent.

I like placing these little scenes for people to find and I expect you'll find more of these as the layout develops. Particularly considering I have an expanse of concrete I need to break up the monotony with these little cameos.

By the way, I'm tempted to add a little stream at the rear where the little girder bridge is similar to the stream that runs parallel with the spit before emptying out into the Solent. (Edit: I'm not sure it does go into the Solent but just ends in a pond!) The jury is still out on that one.

Anyway, here's the photo, apologies for the background but it's been too wet and windy to go outside!


Monday, 12 July 2010

Trackbed complete

Trackbed complete

Time spent so far:

30 mins - ply base
1 hour - ply track supports
2 hours 30 mins - trackbed

Total: 
4 hrs

This top picture shows the trackbed has been completed. (Without NG track shown)

This picture shows the NG track.

Next job on the list is to buy 3 right handed 009 points and two yard of flexible 009 track. I will be able to get some builders insulation for the rest of the board (to keep weight down) in the week so a start can be made on the basic relief of the land. The next job then will be to drill holes for the point motors and then pin all the track down.

Really glad this project is getting going - it has taken me too long to plan it. I've been thinking about the new layout for months now! The seaplane has been built awaiting painting and today I went to the real place to take some prototype photos (Over 100!). Looks like this layout might meet it's deadline...