Wednesday, 28 December 2011

Another blog project to follow!

Hello Guys!

As you will have noticed, nothing has been done to the layout during these winter months. This is mainly because it is in the garage but also because I have a new major project on the go!

There is another blog which has details of this project, so if you want to follow my progress bookmark the link and whilst you're at it you can 'follow me' such as you have done on this blog. Thank you all for your continued support. Updates on the other blog should be regular - at least every other day for the next few weeks.
And here is the link:
http://jamsmodelrailways.blogspot.com

My project is described here in this intro:
http://jamsmodelrailways.blogspot.com/p/old-road-southern-byway-10-x-8-shed.html

I have ordered a whole load of modelling materials for this project for a sizeable sum which should arrive tomorrow - so expect an update in the afternoon/evening.

Well I guess that's all for now, if you want to ask me any questions or give me advice, send me a comment or an email (jamiewarne44@yahoo.co.uk).

Thanks!

Thursday, 4 August 2011

Thanks!

I know it's been a small while since I last posted - apologies for that.
I've had an interesting few weeks! Firstly, although I haven't worked on Calshot for a while, I have been working on my 2011 Challenge entry (AGWI petroleum) (More info and photos here: AGWI - challenge entry)

I'm hoping work on Calshot will recommence as soon as possible although there is some big news!
There is a probablility that we may be moving (my first house move). It will be a bigger property and there should be room to set Calshot up properly - this will make working on it easier.

Now, as to the title, I would like to say a big and hearty thank you to everyone who follows and comments on this blog - I could not do it without you! Sorry for this photoless post (it's not often I do it!), but I felt I needed to express my thanks for all my followers.

Jam

Saturday, 9 July 2011

Fete Fantastic!

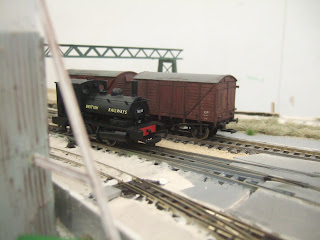
Well today as some of you will know was the layouts first outing since early May. I hadn't touched the layout since then and so I had no idea  whether it would work or not! However, luckily it did and so I set about making the hangar. Unfortunately I ran out of time and so the back of the hangar was roofless and the front had just a simple bit of textured paper led across it. It didn't look great!

However, I have noticed something - from up high the layout doesn't look particularly special, but as I hope these low level shots prove, from eye level it looks pretty good. I am tempted to make the layout higher but then again I don't want to upset wheelchair users or kids...

Anyway, at the start of the day I wasn't impressed with the look of the layout, however as I started to take some low level photos I realised it was OK, so long as you focused away from the incomplete hangar and poor SG ballasting! Eventually the hangar will be complete, the whole layout tidied up and minor niggles sorted out...

The fete went really well and I got some good feedback from the public. The event was well organised and the sausage bap was absolutely lovely!

On with the photos (I've uploaded them as full-res versions, so just click on them to open up the large versions):


Till next time,
Jam

Wednesday, 6 July 2011

A day out on the Swanage Railway

Below are some photos from today's visit to the Swanage Railway, I won't add any more text in the hope that the photos are enough. All I will say is that if you haven't been go and take a look!


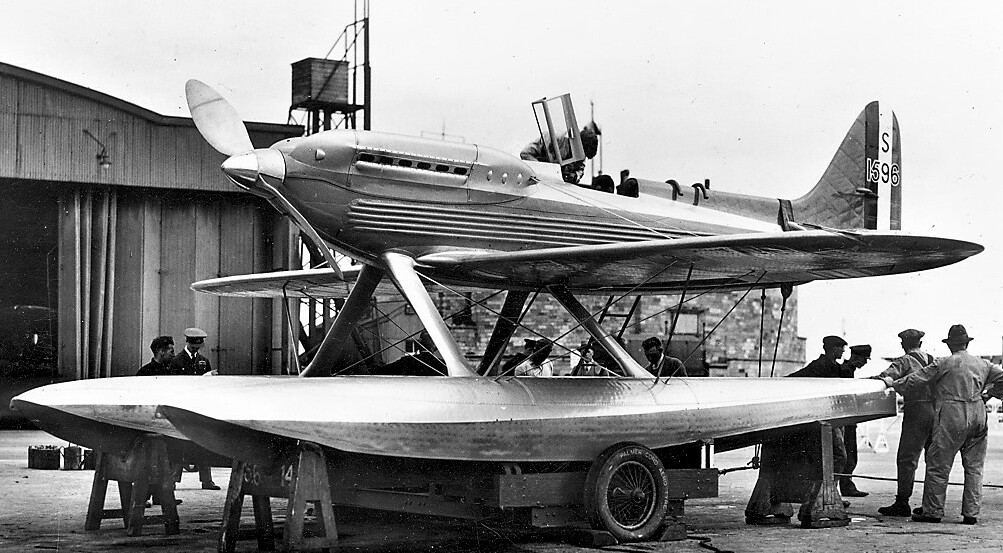
400mph on floats!

Hello guys,
It's been a while I know but now all the exams are over and I'm on my summer holiday!
Calshot+operation mirror image attended the Woodgreen Show and got some favorable comments.
This did somewhat surprise me if I'm honest because there was no backscene and the hangar was simply made from paper textures and if I'm honest looked quite bad! It definitely shows how not having a backscene is quite detrimental.


A surprise package came through the post a couple weeks back and in it comprised the above - a Supermarine S6.b. You will notice I have started to build the basics of the kit. So far, my initial reactions are that it's a very basic kit and will need some superdetailing, however, it did go together well though and suits the location absolutely spot on! I believe the real seaplane won the Schneider Trophy at Calshot. It also appears on my blog header. The kit will certainly benefit from rigging and there are a few areas where more detailing needs to be put on. It is a lovely little thing though, thank you Declan from SMC!


Anyway, I went to up to the real Calshot a couple weeks back and tried to take some panoramic shots for a new backscene. Only one worked I'm afraid but I'll need to find out how I can get it printed. I also have a new project on the go albeit a diorama.

Now I'm looking to replace the hangar with something more suitable. A couple weeks ago I bought some corrugated asbestos sheeting from the local model shop and today I set to work making a start on the rest of the hangar. The trouble with Wills sheets are that they are very small! Only 13cm x 7.5cm I believe which makes it quite expensive to build a large hangar! I'm debating whether I should use some Slaters sheets for the roof for this reason.

I'm very tempted to eventually have this huge hangar as a fully detailed interior. I can see that this will cost a lot in materials though - the roof trusses are going to be very hard to replicate and bl**dy fiddly I should think!

Sunday, 22 May 2011

Diversionary tactics!

Well after a loooong spell of nothing happening on the layout I thought I would spend this weekend doing some armchair modelling. On Saturday I popped into SMC to see what they had in store. I came out with more than I expected including an Airfix resin 'ruined workshop', some Bachmann trees and few other bits and bobs.

The workshop was a bit of an impulse buy, but thats not necessarily a bad thing - it will make a great addition to the layout on  the new section next to the engine shed. It was painted up on arrival at home although it will need more coats of paint to get some variation including highlighting. What I like about these Airfix resin kits is that the box suggests how you might like to paint it giving you the Humbrol paint numbers accordingly.


The three trees from the Bachmann range were very nice and at 3 for £7 I couldn't really say no! I am planning to use these around the ruined workshop (and even one inside!). The trees themselves are nicely finished and are semi flexible. The bases are removable for planting too.


The next project was the Airfix Bedford MK Refueller. Now, although this is some 20 years out of my era I couldn't resist it! The kit is a pretty good quality with some nice detailing. The interesting thing about the kit is that the cab body is one piece of glazing which you have to paint rather than two separate pieces. This gave the cab a good feel of depth. Again, this isn't yet finished, but the painting has already taken me 3 hours. The tyres have been painted a dark grey/brown colour rather than black because black does not scale down into 1:76/2! I am really pleased with the end result although I have got about 5 pieces of kit surplus to requirements - there is no information about where they should go on the vehicle. All I know is that one of them is a PTO driven hose reel. Still, it is a nicely designed kit - full marks to Airfix for that one.


Tuesday, 10 May 2011

Woodgreen Model Show 2011 - Just a short guide

Here are a couple of videos showing this years event. I help to run the event again this year and it was good to see such a vast array of models from model railways to model engineering exhibits to live steam outside. Unfortunately the visitor numbers were down on the last year, but I'll be taking the reigns for next year and organising some more model railway layouts to attend and try and advertise it a tad better.


If you want to know more information then please email me at jamiewarne 44@ yahoo.co.uk (without the spaces). I will post information about next years event as and when.

Huge thanks goes to SMC's Declan for his help and hospitality during the event. If you're in the area please check out Salisbury Model Centre!

That's all for now, I'm afraid it is time I did some revision!

Monday, 25 April 2011

Operation Mirror Image - Day 10

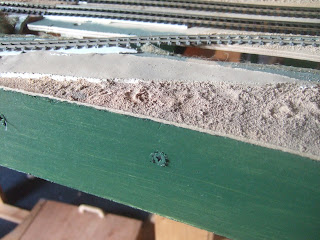
Well there was yet another flurry of activity today. My dad volunteered to repaint the fascia. He opted for quite a nice green colour actually instead of the black. It won't match the layout curtain but nevermind! The standard gauge track was also layed on the extension and both the standard gauge and the narrow gauge lines have been raised up to meet the edges of the old layout as shown in the first photo.

So far the turntable has been nothing but a headache, but we are slowly getting our way through it. It will have two tracks on it which will be hard to get aligned correctly but we'll give it a go.

Whilst dad was sorting out all the painting I started focusing on the very front of the new extension. The beach was carved out of polystyrene. TOP TIP - hoover at the same time as carving polystyrene - saves hours of clearing up afterwards. This was then covered in modelling clay (not DAS this time but a cheaper and much stickier brand. What should have taken me half an hour, took an hour and a half! The 'promenade' was also built up and the slipway fixed into place. This will all be painted in due course.


Any suggestions let me know!

Sunday, 24 April 2011

Operation Mirror Image - Days 8 & 9


Another joint blog entry today. We only have 5 days left to get Calshot ready for showing! 
Today saw the pelmet being constructed mainly by my Dad (as I had coursework to do unfortunately!). It was a right pain in the proverbial to do but we eventually got there! It's a bit Heath Robinson and very much bodged but it all works (just about). The boards were set up in the garage as it provides a bit more shelter from the heat than the conservatory does. This has the added benefit of being able to work on all sides of the layout. The pelmet is part recovered from the previous layout but there is one major difference- it is split into sections. The sections can be pushed together or taken apart to make transportation easier and are attached by dowels inserted into blocks of wood (that are screwed onto the pelmet). Although it looks a bit flimsy in the photos, it is strong enough to support it's own weight so there are no real issues there.
The train turntable did not work as anticipated so we had to cut it down. (This is because the circle wasn't particularly circular!) I am hoping that fixing aluminium angled strip onto the sides will solve the rotation problems and make it a bit more level.
The other obvious addition are the trees. These superb examples were bought from The Model Tree Shop. I'm afraid the photos below are a bit rubbish and don't show them off too well, however, take it from me - they really are great!
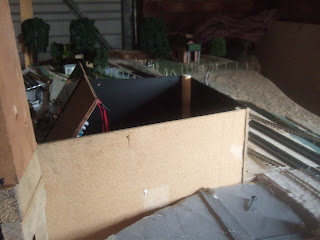
The control panel has had a wooden hardboard shell put round the back of it. This will not be left as is - it will be clad with corrugated iron and from the hangar that was there originally.


And finally...
 I would like your opinion about what to do with the backscene. currently it is far too short and will eventually have to be reprinted. However, I was thinking as a temporary measure of having a 'curtain' of white/pale blue around the back of the layout. This would be attached similar  in fashion as a net curtain. I would appreciate your thoughts on this!